Found a chip, scratch, or patch of road rash on your car? You might wonder if taking it to the garage for an expensive respray is the only way to repair the damage. The good news is that you can apply auto repair paint from Chipex™ in three easy steps.
The secret to getting a professional-level repair at home? Blending. With this in mind, let’s look at how you can blend in your touch up paint to create a seamless finish.
What is touch up paint blending?
‘Blending’ is a process where you perfect the transition from the car’s newly touched-up paint over a damaged area, and the existing bodywork. It’s essentially a trick of the eye, an illusion to make it seem as though the chipped, scratched, or scuffed part of the car has always been the exact same colour and finish as the rest of the vehicle.
Ensuring as close a colour match as possible is vital for a high-quality paint repair, and with Chipex™, you can do this using our ‘find my car colour’ tool. This allows you to order a touch up paint kit that matches your vehicle’s OEM bodywork precisely by identifying your car’s paint code.
However, there are other factors that affect how well your repair paint blends in:
- The original paint may have become worn, aged, or faded, which can highlight hue discrepancies.
- If you apply a thick layer of touch up paint, it can create an uneven texture, making the repair more visible.
- Temperature and humidity are also important when painting. They can cause the newly touched up or applied paint to dry faster or slower, resulting in a distinct finish that’s unlike the rest.
Blending helps mitigate these issues, allowing the newly applied colour to evenly merge into the existing. It creates a smooth, cohesive surface and makes sure there are no bubbles or air pockets that could create space for rust and corrosion to set in.
How to apply and blend auto touch up paint
So, what is the best way to blend touch up paint on a car? Let’s look at a step-by-step approach to expert blending using a Chipex™ paint repair kit.
Once you’ve ordered and received your colour matched touch up paint kit, make sure you have a well-ventilated space to work in that’s a minimum temperature of 0℃. Check you have everything you need:
- Your custom mixed Chipex™ Paint
- Blending solution
- Polish
- Nitrile gloves
- Microfibre cloth
- Polish removal cloth
- Microbrush applicator
- Instructions
We offer three kit sizes so you can get the right amount of paint for the damage at hand, without anything going to waste.
Choose from our Lite touch up paint kit, which provides enough paint and accessories to repair up to 12 areas of damage, the Plus touch up paint kit, which allows you to resolve up to 24 chips or scuffs, and our Pro car repair paint kit, which includes much more paint and has a three-year shelf life so you can keep your vehicle’s bodywork in top condition long-term.
Preparing your vehicle for touch up paint application and blending
First, set yourself up for a successful paint application and blend.
- Thoroughly wash your vehicle, paying close attention to the damaged area to remove dirt, road grime, and contaminants.
- Allow the surface to dry completely, as any trapped moisture can affect paint adhesion and the final finish.
- Strip away all wax, polish, or protective coatings from the repair area to ensure the touch-up paint bonds correctly.
- Shake the touch-up paint vigorously to ensure the colour pigments are evenly mixed before application.
- Always use protective gloves and suitable eye protection, and carry out the repair in a well-ventilated space.
- Begin by practising on a small, inconspicuous area to become comfortable with the process before moving on to the visible repair area.
Applying your touch up paint
Now it’s time to apply your colour matched paint.
Use the microbrush application from your kit to add a layer of touch up paint, covering the chip or scratch around it. Keep the coat thin and even — you can always build up the layers. Let this dry for up to five minutes.
How to blend and polish your car paint touch up
This is the essential part of the process for a truly flawless paint repair.
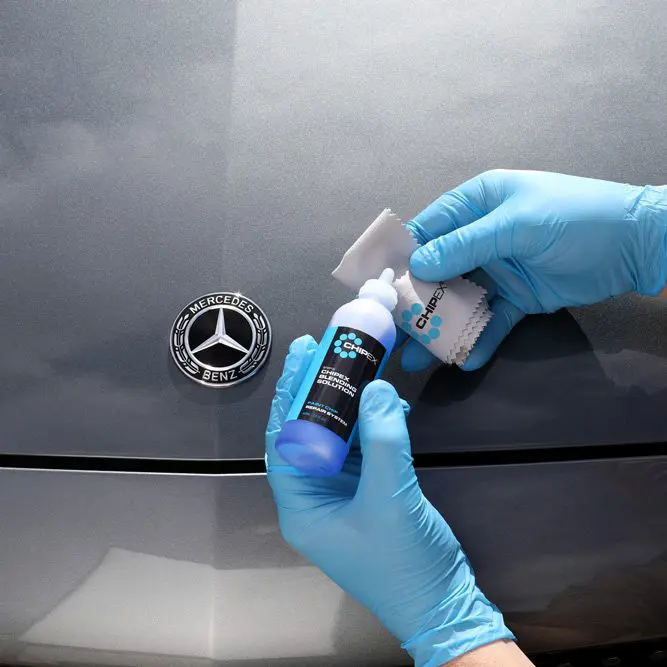
- When your layer of paint is touch-dry, add a small amount of blending solution to your paint removal cloth.
- Run the cloth along the painted area, applying light pressure as you go. This will remove excess paint while retaining colour coverage, so the new paint will merge with the existing. There’s no need to rub. Instead, let the blending solution do its job.
- Once you’ve removed the excess paint around the car’s scratch or chip, leave it to dry for a few minutes.
- You may need to repeat the paint application and blending process several times to build up seamless coverage. Ensure each layer dries fully before adding the next.
- When you’re happy that the layers you have built up are well-blended, you can polish the repaired area. Apply the finishing polish from your repair kit using the microfibre cloth.Leave it until it has dried to an opaque haze, then gently remove it again using a clean section of the cloth. This should leave it gleaming.
We recommend polishing the whole panel, rather than just the repaired patch so your newly applied paint blends perfectly in.
Note: You won’t need to use the finishing polish if using matte vehicle repair paint
Apply and blend for flawless paint repairs with Chipex™
You can trust in the Chipex™ touch up paint system to get professional-level repairs that blend in with your vehicle’s existing bodywork.
Whether you’re repairing a scratch on your Jaguar Sovereign or road rash on your VW Golf, you can apply, blend, and polish until the damage is practically invisible.
Find your car colour code and order your touch up paint kit today with Chipex™.
Can’t find your color code? enter your details manually here


